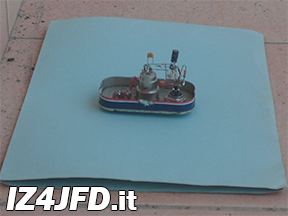
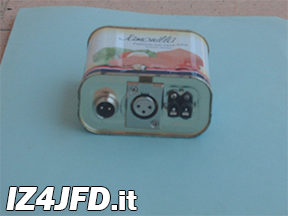
Massimiliano, AF balun (SS version)

Massimiliano is a circuit designed to carry an audio frequency signal from a balanced source to a load with an unbalanced input. As an OM, the first microphones I used were active condenser cartridges (ECM cartridges), which have an unbalanced output. A dynamic microphone, on the other hand, is a transducer with balanced output. The best way to couple it to the unbalanced microphone input of an RTX is to interpose, between them, a circuit based on a differential amplifier that acts as a kind of "active balun". That is to say, to transport the audio frequency from a balanced output to an unbalanced input. Furthermore, such a circuit would have helped me eliminate the RF feedback that was present in my modulation if I was using a dynamic mike connected directly to my Kenwood TS-140S. Massimiliano, in his simplicity, managed to satisfy all the requirements it was designed for.
Unbalancer stage
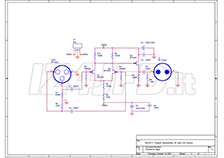

Massimiliano (SS version) - Unbalancer stage
Schematic diagram (PDF)
The output of an AF signal source is said to be "balanced" when the positive peak and the negative peak of the AF signal are simultaneously present at its output terminals (each peak on its own terminal). Conversely, the output of an AF source is said to be "unbalanced" when the two half-waves of the signal are both on one of the two output terminals of the source, while the other terminal has a constant and null electrical potential.
Dynamic microphone cartridges belong to the first type (balanced audio-frequency signal sources), and Massimiliano was designed for sources like these: as its schematic diagram shows, the balanced audio signal coming from the microphone is applied to the gates of the two BF245C FETs that make up the input stage of the converter and are connected together in order to create a differential amplifier.
The particular configuration of these transistors determines the behavior of the entire amplifier. That is, when one of the two transistors amplifies the positive half-wave of the audio signal at its input, a variation occurs in the current flow within the source resistance shared by both FETs, which is accompanied by a variation in voltage drop across it. The other transistor, at the same time as the first one, amplifies the negative half-wave of the audio signal producing a current variation and a voltage drop opposite to those generated by the first FET.
The result of this operation is a constant voltage value across the source resistor: from this mutual "compensation" operated by the two transistors derives the main characteristic of the differential amplifier, which amplifies the difference between the signals placed at its input, and not the signals themselves.
For each frequency in the audio signal coming from the balanced source, Xa indicates its positive half-wave and -Xb its negative one. Xa and Xb have the same value, but opposite sign: working by subtraction, the differential amplifier performs the operation
Xa - (-Xb) = Xa + Xb
Therefore, both half-waves of the balanced, input AF signal are present at the differential amplifier’s output.
The output of the unbalancer is a third FET, identical to the previous two and DC coupled to the drain of one of them, which operates in a common drain configuration giving the entire circuit a very low impedance output, which lets any type of shielded cable be used to carry the audio signal from Massimiliano to an RTX unbalanced microphone input, or to a subsequent circuit.
The ideal situation would be the one which features parts with identical characteristics: for my homebrewing, I had two FETs available from the same batch (if it is not possible to talk about a "selected pair", however, it is the best I could do); for all resistors connected to the transistors, it is advisable that they have the same tolerance, and that tolerance be as low as possible.
Power supply stage
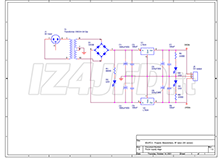

Massimiliano (SS version) - Power supply stage
Schematic diagram (PDF)
Massimiliano's very simple (but not trivial) power supply circuit starts with the mains transformer (having a primary at 220Vac/50Hz and two secondaries at 24+24Vac/50mA) and with the rectifier/leveling stage consisting of a W10M full-wave rectifier bridge and two 3300uF/50V electrolytic capacitors.
After these components, there are two voltage regulators ICs, a 78L24 and a 79L24, which define the DC voltage which will supply Massimiliano’s unbalancing stage (24 + 24Vdc). Downstream of each IC, two other capacitors, an electrolytic and a polyester one, allow a further leveling of the regulated voltage and offer an escape route to ground for any non-DC electrical signals that have managed to "bypass" the 78L24 and the 79L24 (including 100 Hz ripple).
Post scriptum
What makes Massimiliano unique, in the universal context of DIY projects for amateur radio use, is the box which houses the unbalancer stage.
Once I verified that everything works as expected, I needed a metal container inside which everything could be placed. In my area, an adequately sized box was not commercially available. And I didn't want to spend too much money to buy one online. So, I chose an "alternative" solution. One morning, during the normal sortie for daily shopping, I was wandering around inside our usual supermarket. All of a sudden, I came across a pork pie made in Denmark, whose metal box was roughly the size of what I needed.
Back home, I opened the product, poured the contents into a plastic dish, and I washed the inside of the box to remove all traces and flavours of what was there until then, paying extreme attention to the edges (very sharp and extremely dangerous) of the two parts into which the container got left divided after opening it. With all due respect for the pie and for those who produce it (we are talking about food, in any case), it became a meal for my cats, who consumed it within 1 - 2 days showing not so much interest in it.
After the box dried, I drilled the holes for the inlet and outlet connections, and I made the unbalancing stage on-the-fly inside it. Finally, I closed the box by applying 4 solder points to its two halves. During Massimiliano's use, this “packaging” behaved as I expected, like a metal box for electronic circuits: hence my decision to continue using it for the unbalancer stage, while Massimiliano's power supply stage is housed in a separate container. Between them, a two-wire, red/black band acts as a bridge: at one of its ends (converter side) there is an RF choke (made by winding the band on an E-core type ferrite) to prevent any radiofrequency feedback from reaching the unbalancer stage and disturbing its correct functioning.


